Hello Everyone, Debra here to share with you my latest project for the Helmar Design Team. Days at the beach are always fun, so was creating this layout. To secure the larger background pieces,I used Spray Adhesive. I always take this glue outside to use, ensure you use in a well ventilated area. Close Up 1 Shells and Art Stones are adhered using the Helmar Acid Free Glue. This glue dries clear and dries a little slower than the craft glue, giving me more time to place the elements. Close up 2 The gauze pieces are adhered using the Helmar, Craft Glue Which is quick drying. Close Up 3 The clear drops attached to the flowers are attached using the Craft Glue, which dries quickly and dries clear. I also used t...
Posts
- Get link
- X
- Other Apps
Hello Everyone, Can't believe the first month of 2024 has come to an end already. Today I am sharing my inspiration layout for February for Denise Boddey Designs. I have created a double page layout, using the new Enchantment Collection. I used white cardstock as the base for my layout. I used 3 different sheets of paper from the collection to create my layout. I fussy cut elements from the papers, Using these elements, I layered them backing each piece with thin cardboard, then layered the pieces until I was happy With the look of it all. I then used the ornate frames, cutting each into 2 pieces , then adding them into my layout. I heat embossed the Word title, YOU, with green embossing powder, then added to my layout to complete it. Above and following are close ups of my layout. I loved the Toadstools, the flowers and all the images from the collection Hope you like what I have created. Debra.
- Get link
- X
- Other Apps
Hello Everyone. Today I am sharing a gorgeous card I have created using papers from the beautiful New Enchantment collection I chose 2 sheets of paper to use, Faerie Dance and a Magical Place Next I fussy cut some of the images from the papers I used a stencil with texture paste to add extra interest to the background. I then added some colour over the texture paste using Oxide ink. Next I started to layer my fussy cut elements, adding foam tape to the back of each piece to add height and seperate my layers. Lastly I added some Diamantes to the flowers centres, to add a little sparkle to my completed card. ...
Helmar December Merry Christmas Layout
- Get link
- X
- Other Apps
Hello Everyone , Debra from the Design Team, here to share with you my latest creation for the Helmar Creative Team. Being December I decided on a Christmas theme for my layout. Firstly I chose my Helmar Glues, remembering each glue has a different uses. The acid Free Craft Glue , I used to adhere my layers of cardstock and cardboard. The 450 Quick Dry Adhesive I used to adhere my chipboard and all the stars and bling on the Christmas tree. To begin my layout, I Glued off cuts of thinner Cardboard to the back of each layer using the Helmar acid free craft glue. I continued layering all the layers and embellishments till I was happy with it all Next I added my photo and some final embellishment pieces. to finish the layout I added my chipboard Merry Christmas, then decorated the tree with stars and bling. These I adhered using Helmar 450 Quick Dry Adhesive Here are some closeups Showing some of the detail Close Up 1 Close Up 2 Close Up 3 A...
- Get link
- X
- Other Apps
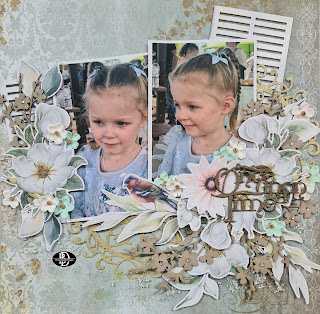
Hi Everyone, Debra from the Denise Boddey Design Team here to share with you a layout I have created using lots of lovely products from the Denise Boddey Designs Shop. I had lots of fun putting this one together I used the the In The Castle paper from the Day Dream Story Book Collection. I used the Shutters Chipboard angled behind my photos. layers of fussy cut flowers and leaves surround my photos. Raw chipboard sprigs are tucked in among the flowers , with extra small paper flowers added. I used the Deco Half Circle Die, cut in gold glitter paper, tucked in amongst my biggest cluster. To complete my layout I added the chipboard Title, Once Upon A Tine, embossed with gold embossing powder. Products I used can be found at- deniseboddeydesigns.com Hope you like what I have created. Debra sentimentalistscrappingjourney.blogspot.com
- Get link
- X
- Other Apps
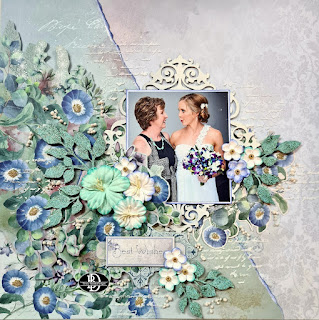
Hello Every one, Debra here from the Denise Boddey Designs design team. Today I am here to share with you my very first creation for Denise Boddey Designs I used papers from the beautiful Elegance Collection papers, which I have fussy cut, torn , inked and layered My photo is mounted on a fancy chipboard frame. Ornate Chipboard Frame I embossed the leafy chipboard pieces and tucked them under the flowers I have added. I have added more texture to the layout using texture paste through a stencil, then added some Artstones for added detail. The printed flowers on the paper I have glued gold microbeads for the flower centres so that the flowers pop. Hope you are inspired to create using these beautiful papers from Denise Boddey Designs Debra
- Get link
- X
- Other Apps
.Hi Everyone, Today I am here to share with you a layout I have created for the Handmade Embellishments Challenge at Papercraft Secrets, Creating With Confidence. I have used some older Cocoa Vanilla papers some Pinwheels for my layout. I have handmade some Pinwheels for my layout. they are quick and easy to make and look great on this boy layout. I used some diecut mesh and cogs and a few other embellishments to complete my layout Hope you are inspired by my layout and may like to try making some pinwheels yourself. Until Next time ...